- Welcome
- Getting started
- Latest updates
- Foundations
-
Components
- Accordion
- Alert
- Alignment
- App Search Modal
- Aria live
- Autosuggest
- Badge
- Banner alert
- Bar chart
- Blockquote
- Bottom navigation
- Bottom sheet
- Breadcrumb
- Breakpoint
- Button
- Calendar
- Card
- Card list
- Card button
- Carousel
- Checkbox
- Chip
- Chip group
- Code
- Content cards
- Data Table
- Datepicker
- Description list
- Dialog
- Divider
- Drawer
- Field Set
- Flare
- Flat list
- Flight leg
- Floating action button
- Floating notification
- Form label
- Form validation
- Graphic promotion
- Horizontal navigation
- Icon
- Image
- Image Gallery
- Infinite scroll
- Info Banner
- Inset Banner
- Link
- List
- Map
- Mobile scroll container
- Modal
- Navigation bar
- Navigation Tab Group
- Nudger
- Overlay
- Page indicator
- Pagination
- Panel
- Phone input
- Picker
- Popover
- Price
- Progress bar
- Radio button
- Rating
- Rating Bar
- Scrollable calendar
- Search Modal
- Section header
- Section list
- Select
- Skeleton
- Skip link
- Slider
- Snackbar
- Snippet
- Spinner
- Split input
- Star rating
- Swap Button
- Switch
- Table
- Text
- Text input
- Theming
- Ticket
- Toast
- Tooltip
- Touchable native feedback
- Touchable overlay
- Search Input Summary
- Content
- Accessibility
- Contributing
- Localisation
Bottom sheet
Bottom sheets are views rendered on top of screen content, containing supplementary content that are anchored to the bottom of the screen.
Backpack/BottomSheet

Default
| Day | Night |
|---|---|
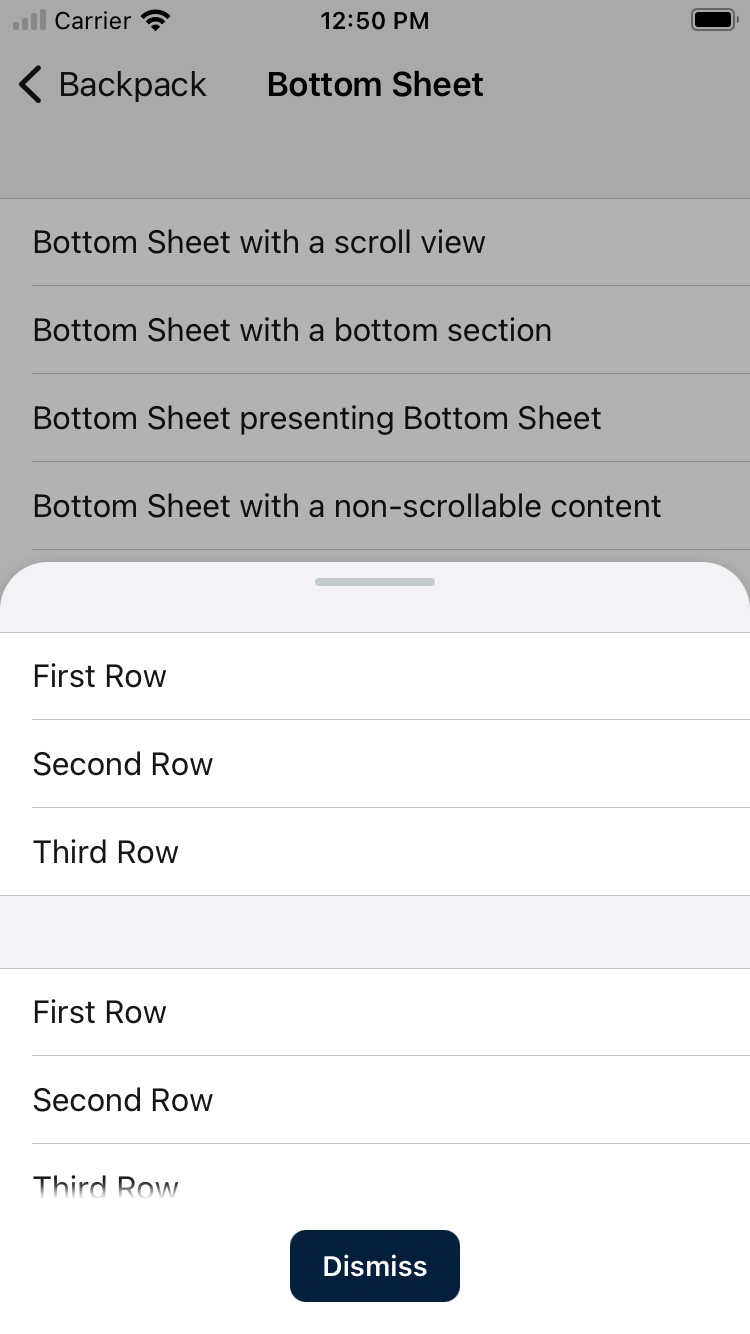 |
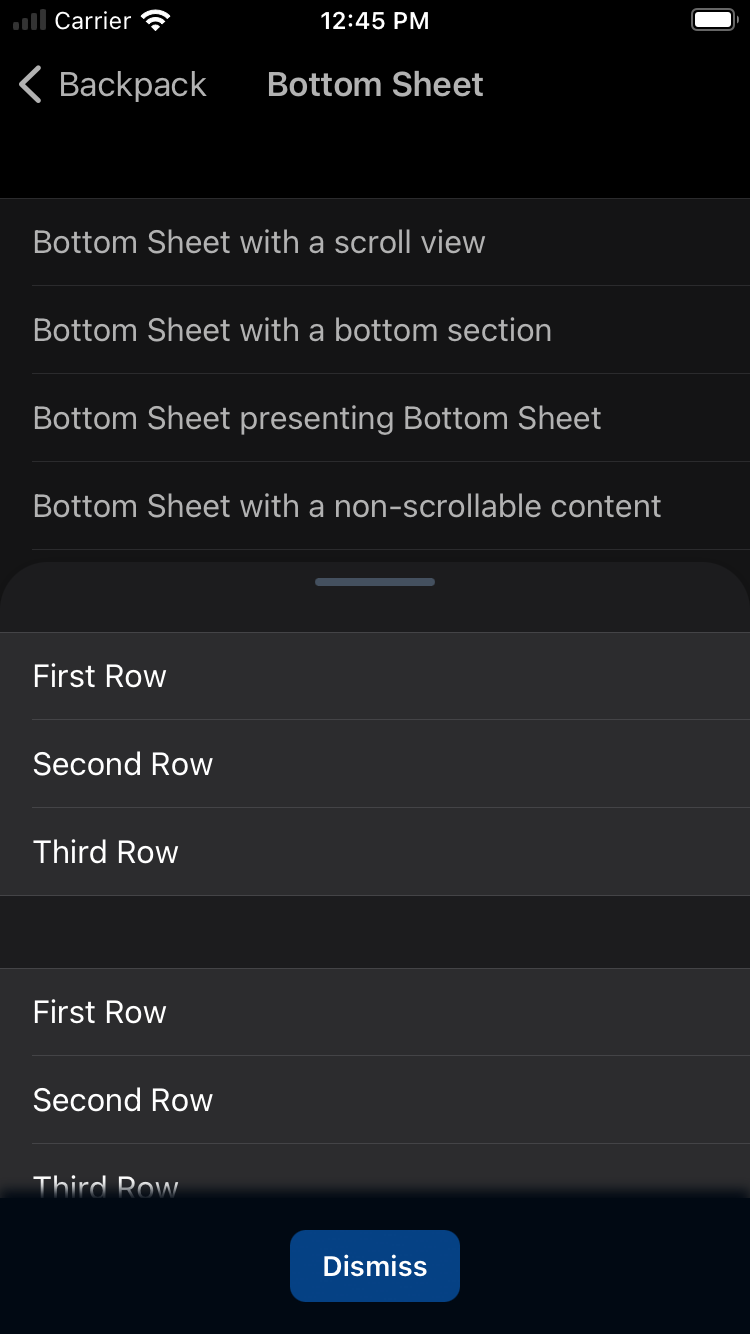 |
Installation
In Podfile add
pod 'Backpack/BottomSheet'
and then run pod install.
Usage
Bottom Sheet
Backpack/BottomSheet is a component for presenting a floating panel similar to the one used in Apple Maps, Stocks and other native Apple apps.
Swift
                                                import Backpack

                                                let contentViewController = ... // A view controller that contains any kind of scroll view
                                                let bottomSheet = BPKBottomSheet(contentViewController: contentViewController,
                                                                              scrollViewToTrack: contentViewController.scrollView)
                                                bottomSheet.present(in: self, animated: true, completion: nil)
With an intrinsic height
When you want to present a view that does not scroll, you can create a Bottom Sheet without passing in a scroll view. The view will then use the size of the contents to determine the size.
                                                import Backpack

                                                let contentViewController = ... // A view controller
                                                let bottomSheet = BPKBottomSheet(contentViewController: contentViewController)
                                                bottomSheet.present(in: self, animated: true, completion: nil)
With a fixed bottom section
                                                import Backpack

                                                let contentViewController = ... // A view controller that contains any kind of scroll view
                                                let fixedBottomSectionViewController = ... // A view controller that will be fixed at the bottom (won't scroll)
                                                let bottomSheet = BPKBottomSheet(contentViewController: contentViewController,
                                                                              scrollViewToTrack: contentViewController.scrollView,
                                                                              bottomSectionViewController: fixedBottomSectionViewController)
                                                bottomSheet.present(in: self, animated: true, completion: nil)
Persistent presentation style, similar to the one used in Apple Maps.
                                                import Backpack

                                                let contentViewController = ... // A view controller that contains any kind of scroll view
                                                let fixedBottomSectionViewController = ... // A view controller that will be fixed at the bottom (won't scroll)
                                                let bottomSheet = BPKBottomSheet(contentViewController: contentViewController,
                                                                              scrollViewToTrack: contentViewController.scrollView,
                                                                              bottomSectionViewController: fixedBottomSectionViewController,
                                                                              presentationStyle: .persistent)
                                                bottomSheet.addPanel(toParent: self)
Moving the Bottom Sheet
You can move the Bottom Sheet, by calling the move function. In snapshot tests you need to set animated to false, to make sure you get the correct Bottom Sheet state.
The animated parameter is optional and has a default value of true
bottomSheet.move(to: <BPKFloatingPanelPosition>, animated: false)
Made with ❤️ by Skyscanner © 2024
© 2024 Skyscanner Backpack. Page last updated on Aug 8, 2023, 08:30